
| Lost access vs. new codes | Account Admins and Login.gov access | Filling out the application | Understanding the .eis file | Authenticate documents | The nuances of notaries | Resume and submit |
Key takeaways:
- Best practices include getting organized before starting, and executing tasks in a specific order
- Coordination and communication between parties with an interest in a filing entity is now paramount
- Form ID is a multifaceted process involving filling out a web-based form, printing and notarizing
- Plan ahead and apply for codes as soon as possible
- Be prepared to wait an average of 6-8 business days for the SEC’s decision regarding the Form ID application
- The role of account administrator is now an active, ongoing responsibility
Lost access vs. new codes
Whether you are a new filer looking to obtain EDGAR access codes for the first time or you have been issued codes in the past but have lost access to the CIK’s account, you must complete a Form ID application to be able to file on EDGAR.
Option 1: New EDGAR account
This applies only to Individuals and Companies who have never been issued a CIK (Central Index Key) before.
Tips for checking whether your officers and directors have an existing CIK:
- Ask the individual: They may remember previously having had a reporting obligation. They could also let you know what other boards they are/have been associated with and can connect you to someone familiar with their codes.
- Search Filings on the SEC.gov or the EDGAR Company Database by filer name:
- Try to keep the search broad, using only a surname. EDGAR conforms names, so you want to make sure you are not using too narrow a search term like a full name, or any punctuation. See PDF pages 2-3 of the General Instructions for Form ID for further details regarding name conformance. (PDF page 161 of 167 of the EDGAR Filer Manual Volume 1(v28) is still applicable and a nice illustration of name conformance)
Once you are certain EDGAR access codes have never been issued for this entity, you can reasonably proceed with Option 1.
Option 2: Existing EDGAR account
This option is for those who have been issued EDGAR filing codes at any time in the past but have “lost access” to the existing CIK.
Note: This may still apply to you even if you have not actually filed on EDGAR yet, i.e., you applied and were granted codes but have never submitted a filing.
Common reasons for losing access include:
- Missed the enrollment period: If codes were issued prior to March 2025 and the enrollment period (March-December 2025) was missed for any reason
- Incorrect Login.gov setup:
- You access EFM with one email address but used a different email to apply for codes (a difference could also just be a typo)
- You enrolled or applied for new codes prior to setting up EFM access and missed the 14-day window to accept the invitation for access to the CIK
- Issues with ongoing maintenance:
- Your assigned role was removed or changed
- The annual confirmation deadline was missed
- The CIK account was left without an active administrator following another’s departure
No matter the reason, it is prudent to complete your due diligence before attempting to gain electronic access to a CIK via Form ID. Should your Form ID application be granted by the SEC you will effectively reset this CIK’s account to factory settings; any admins that were appointed during the enrollment period, and any delegation of filing authority that was granted since enrollment will all be removed.
If a filer is unsure whether their CIK had been enrolled in EDGAR Next, an easy way to verify is to ask your filing agent to “send a delegation request”. Three possible results include:
- The delegation request will be initiated:
- If accepted, the filing agent will gain the ability to file on behalf of the CIK;
- If rejected, the filing agent will know that the CIK is enrolled and admins are actively monitoring the account
- The filing agent will see that the CIK does not accept delegation requests (which means it is already enrolled); or
- The filing agent will see that the CIK is not yet enrolled.
If you find that the CIK has been enrolled, you should first try to connect with the current admins and coordinate access.
Account Administrators and Login.gov access
Once you have established whether you are applying for lost access or new codes, you must decide who will be responsible for managing the CIK account. Although companies are required to have two account admins while individuals are only required to have one, we highly recommend that every CIK have at least two account admins to ensure a responsible party is always available.
On the Form ID application itself you will be required to provide information for the minimum number of administrators for each type of account but will only be allowed to provide information for a maximum of two. After the account is established, the initial admins will be able to add more individuals. Each CIK account allows a maximum of 20 admins so there is room for everyone to have a role. Directors and officers should strongly consider adding at least one admin from each board or company with which they are affiliated. Effective coordination and communication amongst all interested parties in a CIK will ensure that everyone who needs access is known to one another.
The first step in becoming an account admin must be to set up access to the EDGAR Filer Management website using Login.gov to create your credentials. Toppan Merrill has detailed instructions on this process here.
Important: The email address that you provide to Login.gov when creating your individual account credentials must match the email address you provide on the Form ID application:
- Login.gov is a method used to log in to various U.S. government websites so many people already have an account. Not all Login.gov credentials have to be the same across agencies. Because information provided on Form ID may become publicly available, we strongly encourage you to use a business email address for this login and anything involving the EDGAR system.
- Each CIK will require a primary point of contact (POC). By default, this POC will initially be set as the individual listed as “Prospective Account Administrator (1)” on the Form ID. The POC information will appear on the EDGAR profile of the CIK after the application is approved. The POC can be changed on the EFM dashboard once additional admins are added.
Because the annual confirmation of data is mandatory for the upkeep of a CIK’s account, the role of account admin is now an active, ongoing responsibility. Should an admin leave for any reason remember that their responsibilities will need to be taken up by another responsible party.
Filling out the application
Although ideally one of the individuals chosen as an account admin should be doing this, technically anyone with access to the EDGAR Filer Management website is able to complete a Form ID application. This is why it is so important for all prospective account admins to set up their Login.gov access prior to the application being submitted. To put a finer point on it, if you have an employee or colleague complete the application but the admins listed on the application miss their notification that the Form ID has been approved; the CIK could end up losing access before ever having truly gained it.
Best Practice: Before applying for EDGAR access, have all prospective account admins create Login.gov credentials using their business email. This same business email address must be used on the Form ID.
The SEC has compiled many resources and created detailed instructions on filling out this six-part, web-based form on this page of their how-to guides. You will also find step-by-step instructions and resource links on the Toppan Merrill Getting Started with EDGAR Filing page.
Understanding the .eis file
As you move through the online form, you will see a “Save & Download” button at the bottom of each section. The file type extension you will be saving is “.eis”, this is the SEC’s proprietary file type used to save your work when filling out an SEC online form. Saving the .eis file lets you exit the application and return later without having to re-enter any data, it allows you to pick up exactly where you left off.
You will not be able to open this .eis file using any other software. Your final .eis file’s sole purpose is to allow you to upload and reopen your saved Form ID application when you are ready to attach your authenticating documents and submit the application.
Be sure not to alter any data you entered into the Form ID application once it has been notarized. The online form you submit must match the notarized version exactly.
Best Practice:
- When you hit “Save & Download” the .eis file will typically save down to your downloads folder with a generic file name. It may be helpful to add an identifier that will help you distinguish between the files.
- Keep yourself organized. Personally, I have a folder on my desktop called “Form IDs” with subfolders named for each applicant inside it. I store all the supporting documentation for each separate application in their respective folders to ensure that I’m not in danger of overwriting any previous work, have everything for each application in separate folders, and can easily refer to archived examples if needed.
- As I fill out the online application I keep saving (and overwriting the .eis file as I complete each of the six parts) to this designated folder. This way there is always only one .eis file in each folder that is the latest version for that particular Form ID application.
Authenticating documents
Once the application is completed, you have proofread and reviewed, and your final .eis is safely stored for future use, it must be printed to PDF, signed, and notarized. The printed, signed, and notarized document must then be scanned and printed to PDF. This PDF will become your “Form ID authenticating document”. (Other examples of authenticating documents include, but are not limited to, POAs (which also require notarization) and cover letters).
Please see the EDGAR Filer Manual, Volume I, for more information about required supporting documentation. The SEC has also posted a guide specific to authenticating documents.
Make sure that any authenticating documents you will be uploading in Part 6 follow the SEC’s file naming standards, as you will not be allowed to attach an improperly named file to your application:
- Must be all lowercase
- Must start with a letter (a-z) and may contain numbers (0-9)
- No longer than thirty-two (32) characters in length (including the extension)
- May not contain spaces
- May contain one period (.), one hyphen (-), and one underscore (_) character
- Must have an extension of .htm, .txt or .pdf. (Example: nk-formid.pdf)
Best Practice:
After scanning your Form ID authenticating document and saving as a PDF, print to PDF again to flatten contents.
The nuances of notaries
Be sure to review the EDGAR Filer Manual Volume 1 (beginning on page 6 of 13) for the SEC’s official specifications regarding notary.
We have heard many success stories from applicants using online U.S. notaries when “the foreign local equivalent of a notary public” hit roadblocks due to various inconsistencies between different international jurisdictions:
- The type of stamp didn’t scan well. Foil seals and ribbons can look blurry in the scanned version and have caused applications to be rejected.
- Notary includes personal identifying information (PII). Some foreign local notary practices involve stamping a scanned ID such as a passport. The SEC has rejected notarized documents containing official PII and requested that any sensitive ID information be redacted prior to resubmitting.
- The SEC has rejected notary information presented in another language and requested that it be translated into English before resubmitting.
- The placement of the signature matters. If the notary signature is required on their seal the SEC has requested that they sign on the designated signature line as well.
Best Practice:
- Keep your Form ID application neat and clear, sign on the lines not around them
- Try to use a notary familiar with the SEC’s requirements
There is no way to get around the notary requirement for the Form ID application. Notary requirements are nuanced and subject to the interpretation of the individual reviewer. Any questions about a specific rejection can be taken up directly with the SEC’s Filer Technical Support team.
Resume and submit
Once you have gathered all the requisite signatures and POAs, notarized all the authenticating documents, and properly named all files:
- Return to the “Apply for EDGAR Access” section on your EFM dashboard;
- Select the “Resume and submit” radio button; and
- Upload (or drag and drop) your final saved .eis file to pick up exactly where you left off online.
It bears repeating that you should not make any changes to the online application at this point. You are only here to upload the final version of the application, add the authenticating documents and submit the application. If you need to make any changes, be aware that you will need to save again and re-print for signatures. Again: The online form you submit must match the notarized version exactly.
Proceed directly to the final step by clicking on the 6 in the progress bar:

Upload all your authenticating documents to the “File selection” box. Click the “Validate & Add Document” button. Assuming you encounter no errors with your authenticating documents, you can click the “Review & Print” button at the bottom of the screen. Finally, scroll through your final application and click “Submit” in the bottom right-hand corner of the screen.
You will receive an accession number:
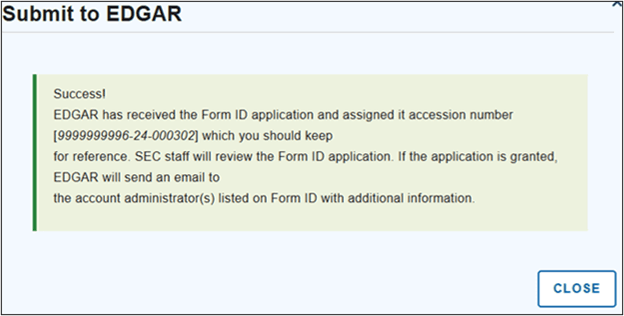
This is not evidence that your application has been accepted; it only acts as a receipt that you submitted the application. You will need to provide this number to the SEC if you have any questions regarding your application while it is under review.
Be prepared to wait an average of 6-8 business days for a response from the SEC.
Please visit the Getting Started with EDGAR Filing page for further resources or contact our e-support team if you have any further questions.
How Toppan Merrill can help
Toppan Merrill is here to help you comply with the Section 16 requirements for Foreign Private Issuers. Contact us at [email protected] or 800.688.4400 to speak with one of our dedicated SEC Reporting experts.